
Task at Hand
Re-IP a Subnet on an Isilon Cluster
Personal Blurb
I was recently handed a task to re-ip a subnet in one of our Isilon clusters, which at first glance I had a bit of a panic moment. After I had some time to cool down, I went about creating a task list of how I would go about this. As soon as I broke this task into the appropriate steps, it took some of the edge off of the project.
Let's get to Work!
- Remove & Create A Record for the new SmartConnect IP
- Log into the appropriate domain controller using your "Administrator" account
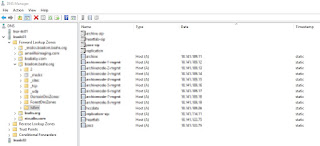
- Open DNS Manager
- In the console tree, expand the appropriate domain's Forward Lookup Zones
- In most cases, you will have a sub folder/domain named "Isilon". Expand the Isilon sub domain
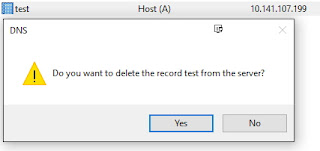
- Remove Original A Record for the Old SmartConnect IP
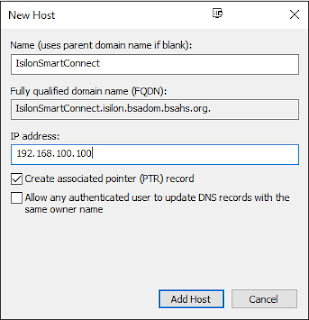
- Create an A Record for the New SmartConnect IP
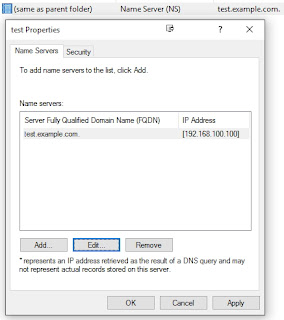
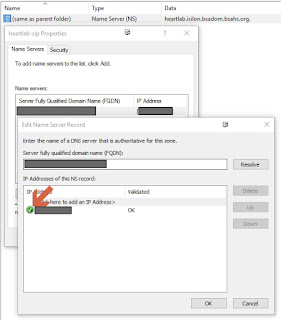
- Adjust Delegation in DNS to point to the new SmartConnect IP
- Open the properties on the respective delegation record
- Adjust the "NS" Record to use the New Smartconnect IP
- Delete Original Subnet
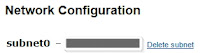
- Connect to your Isilon Cluster Web GUI
- Open up Cluster Management > Network Configuration
- Select the appropriate Subnet
- Select "Delete Subnet" link to the right of the subnet's name
- Create Subnet
- Connect to your Isilon Cluster Web GUI
- Open up Cluster Management > Network Configuration
- Select "Add subnet"
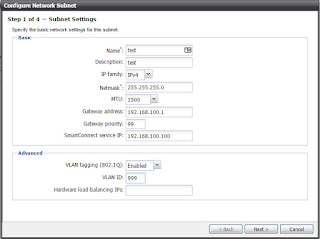
- Fill out the Subnet Form
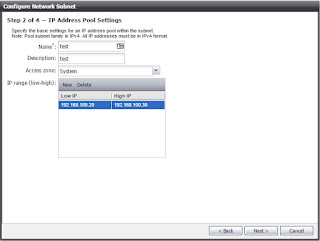
- Fill out the IP Address Pool Form
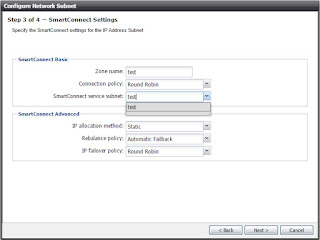
- Fill out the SmartConnect Settings Form
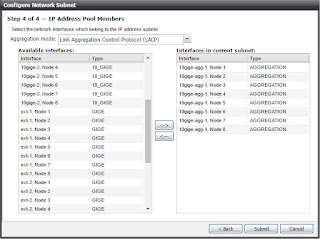
- Select & Configure which Node Interfaces will be used by this Subnet
- Hit Submit
- Validate the subnets configuration looks good
- Validate that the DNS Delegation NS Record shows to be connected
- You are now Up and Running on the new IP Scheme!
Side Note
I worked with an EMC Tech on this Playbook and he helped tweak a couple of points, but he gave his rubber stamp, which was really nice to have before I moved forward with the execution.
No comments:
Post a Comment